Description

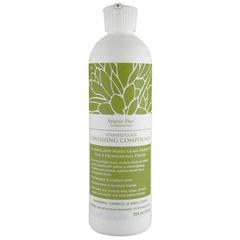
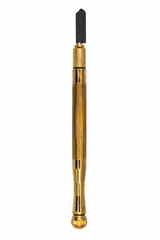
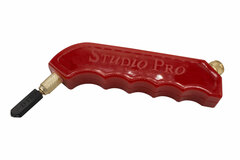
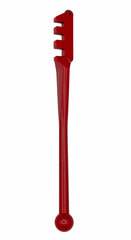
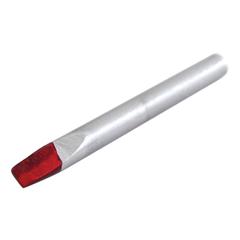
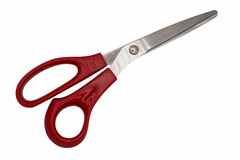
<p><p>Candy Corn Bunting<br /> BY: Debi Cronin<br /> SKILL LEVEL: 3-4<br /> (1 being the easiest, 5 being most difficult)<br /> TIME TO COMPLETE: 4 hours<br /> <br /> MATERIALS CHECKLIST<br /> &bull; 1 sheet Studio Pro&trade; Peaches &amp;<br /> Cream Glass - #910862<br /> &bull; 1 sheet Studio Pro&trade; White Opaque<br /> Glass - #93052<br /> &bull; 1 sheet Studio Pro&trade; Yellow Cathedral<br /> Glass - #916012<br /> &bull; Tin Core Jump Rings<br /> &bull; Manila folder or card stock<br /> &bull; &frac14;&rdquo; Black ribbon<br /> &bull; Black twine or clear filament<br /> &bull; Studio Pro&trade; 60/40 Solder<br /> &bull; Studio Pro&trade; 1/4&rdquo; Copper Backed<br /> Copper Foil<br /> &bull; Studio Pro&trade; Safety Flux<br /> &bull; Studio Pro&trade; Copper Patina<br /> &bull; Studio Pro&trade; Cutting Oil<br /> &bull; Studio Pro&trade; Finishing Compound<br /> &bull; Glue Stick<br /> &bull; Tape<br /> &bull; harpie&reg; Marker<br /> &bull; tools<br /> &bull; Studio Pro&trade; Soldering Iron with a750 tip</p></p><p>INSTRUCTIONS<br /> 1. Measure and mark each 12&rdquo;x12&rdquo; sheet of glass into three 4&rdquo; x 12&rdquo; strips. To do so, use a ruler and a Sharpie&reg; marker to measure<br /> and mark off the sections. Next, hold your glass cutter as you would a pen or pencil keeping the wheel perpendicular to the glass.<br /> Drag your hand as you score to control the motion across the lines. Steer the cutting from your elbow/shoulder not your wrist.<br /> 2. Cut out the pattern provided, staying on the outside of the dark outline. To make the pattern pieces sturdy and reusable, adhere<br /> the pieces to a file folder or cardstock. Cut the pattern from the file folder/cardstock using a foil pattern shears, cutting directly<br /> over the pattern outline. The shears will remove just enough space from the pattern for the foil. If you do not have pattern<br /> shears, simply use a scissors and cut along the inside of the dark outline.<br /> 3. For a traditional candy corn look, use a glue stick to adhere pattern 1 to the white glass, pattern 2 to the orange glass and pattern<br /> 3 to the yellow glass. Please note, some glass has a pattern or flow in the form of a texture or color swirls within the glass. Should<br /> the glass have a flow, make sure it is running in the same direction.<br /> &bull; Studio Pro&trade; Pencil Grip Glass Cutter<br /> &bull; Studio Pro&trade; 1&rdquo; Running Pliers<br /> &bull; Studio Pro&trade; Breaker/Grozer<br /> &bull; Studio Pro&trade; Flux Brush (2, one for flux and one for patina) (or a cotton swab)<br /> &bull; Studio Pro&trade; 2 Pack Fid (or craft stick or pencil)<br /> &bull; tudio Pro&trade; Foil Scissors for pattern cutting<br /> &bull; Studio Pro&trade; Long Tweezers<br /> &bull; Studio Pro&trade; Safety Goggles<br /> &bull; Studio Pro&trade; Heat Resistant Work Surface<br /> &copy;2014 Diamond Tech &bull; Tampa, FL &bull; 813-806-2923 &bull; 800-937-9593 &bull; www.diamondtechcrafts.com<br /> 4. Using a glass cutter, cut the pattern pieces from the glass by scoring, then running the score. If you are new to stained glass, visit<br /> http://www.delphiglass.com/video_view for video instruction on how-to cut glass using a handheld glass cutter.<br /> 5. Next, remove the patterns from glass and repeat step 5 to create 6 more candy corns. Should you have burs or uneven glass<br /> after cutting, use a glass grinder or breaker/grozer to nibble away the edge to make them smooth. WASH ALL GLASS PIECES WELL<br /> WITH SOAPY WATER AND RINSE.<br /> 6. Peel back 2&rdquo;-3&rdquo; of the foil backing from the foil. Holding the glass with the edge toward you, apply foil to the edge of the glass so<br /> that it extends evenly over both sides.<br /> 7. Fold or crimp foil over edges making sure to fold corners neat and flat. Burnish (rub) foil using a fid or a wooden craft stick. Press<br /> foil flat against glass on the outside edge first, then both sides of the glass. Don&rsquo;t scrub as you may rip the foil. Foil all pattern<br /> pieces and place them on a heat resistant surface for soldering.<br /> 8. Tape glass pieces together on the work surface to temporarily hold them in place. Avoid placing tape along the outside edges.<br /> Using solid core 60/40 solder, pull out about 9 inches of solder from the spool, do not cut.<br /> 9. Tack solder the seams on the outside edge of the project. To do so, place a small amount of flux where the seams meet, then<br /> holding the iron above project, allow solder to drop onto the project where fluxed.<br /> 10. Once tacked soldered into place, remove tape and discard. Using a brush, apply flux to the seams. Place the hot soldering iron tip<br /> on the seam you want to solder with the narrow edge, not the flat edge facing up. Now that the tip is on the foil, place the solder<br /> from the spool about &frac12;&rdquo; up from the end of the tip. Gently push the solder into the tip, as you move the tip along the seam. Let<br /> up on the amount of solder when you come to the end of the seam. Now wipe your tip and put the iron back into the iron stand.<br /> Using a tweezers and turn the project over, REMEMBER THE GLASS WILL BE HOT! Flux and solder the back seams.<br /> 11. Apply flux to the outer edge of the project and apply solder, see step 11.<br /> 12. Place the project flat on the work surface; align a jump ring on each side of the candy corn where glass pieces 2 and 3 meet. Hold<br /> one jump ring at a time with long tweezers, flux and tack solder (see step 11) in place. Do the same for the other side, then flip<br /> the project over and tack solder the backside of the jump ring to secure in place.<br /> 13. When project is cool, wash entire project thoroughly using warm water, soap and a soft brush, rinse and dry.<br /> 14. Using a flux brush or a cotton swab, apply copper patina following manufacturer&rsquo;s instructions to the solder, buff and shine using<br /> finishing compound to bring a luster to the project.<br /> 15. Now for the finishing touch, cut five 5&rdquo; lengths of ribbon. Arrange the stained glass candy corns on a flat surface so the jump<br /> rings are next to each other. Thread a length of ribbon through the jump rings tie a knot and a bow, repeat tying each candy corn<br /> together at their jump rings. For more support, thread black twine or clear filament behind each candy corn and through each<br /> jump ring. Use ribbon or black twine/clear filament to hang bunting</p>

Reviews

No reviews have been written for this product.
Log In to Write a Review